Authentication in expo react native with okta
- Published on
Authentication in your application has never been easier and can be accomplished in minutes by using a 3rd party Identity provider such as Okta.
Expo Set Up
We're going to start by creating a new expo project, open up a console window and enter the following commands:
    # Install expo CLI tooling
    $ npm install --global expo-cli

    # Create a new Project & select 'blank' when prompted
    $ expo init auth-example
You can ensure that your installation has gone to plan by running the app with expo start and testing it either on your device or running it on one of the simulators.
Adding Expo AuthSession
We'll want to add AuthSession from the Expo SDK to our project so we can easily integrate with the web browser based authentication flow of Okta. Return to your console and enter:
    # Add AuthSession to project
    $ expo install expo-auth-session
Setting up Okta
First we need to create an account as an Okta Developer which you can do without spending a penny here.
Once you complete the sign up you should be taken to the developer dashboard we need to grab our okta orgs url from this page, you can see it highlighted in red on the following image.


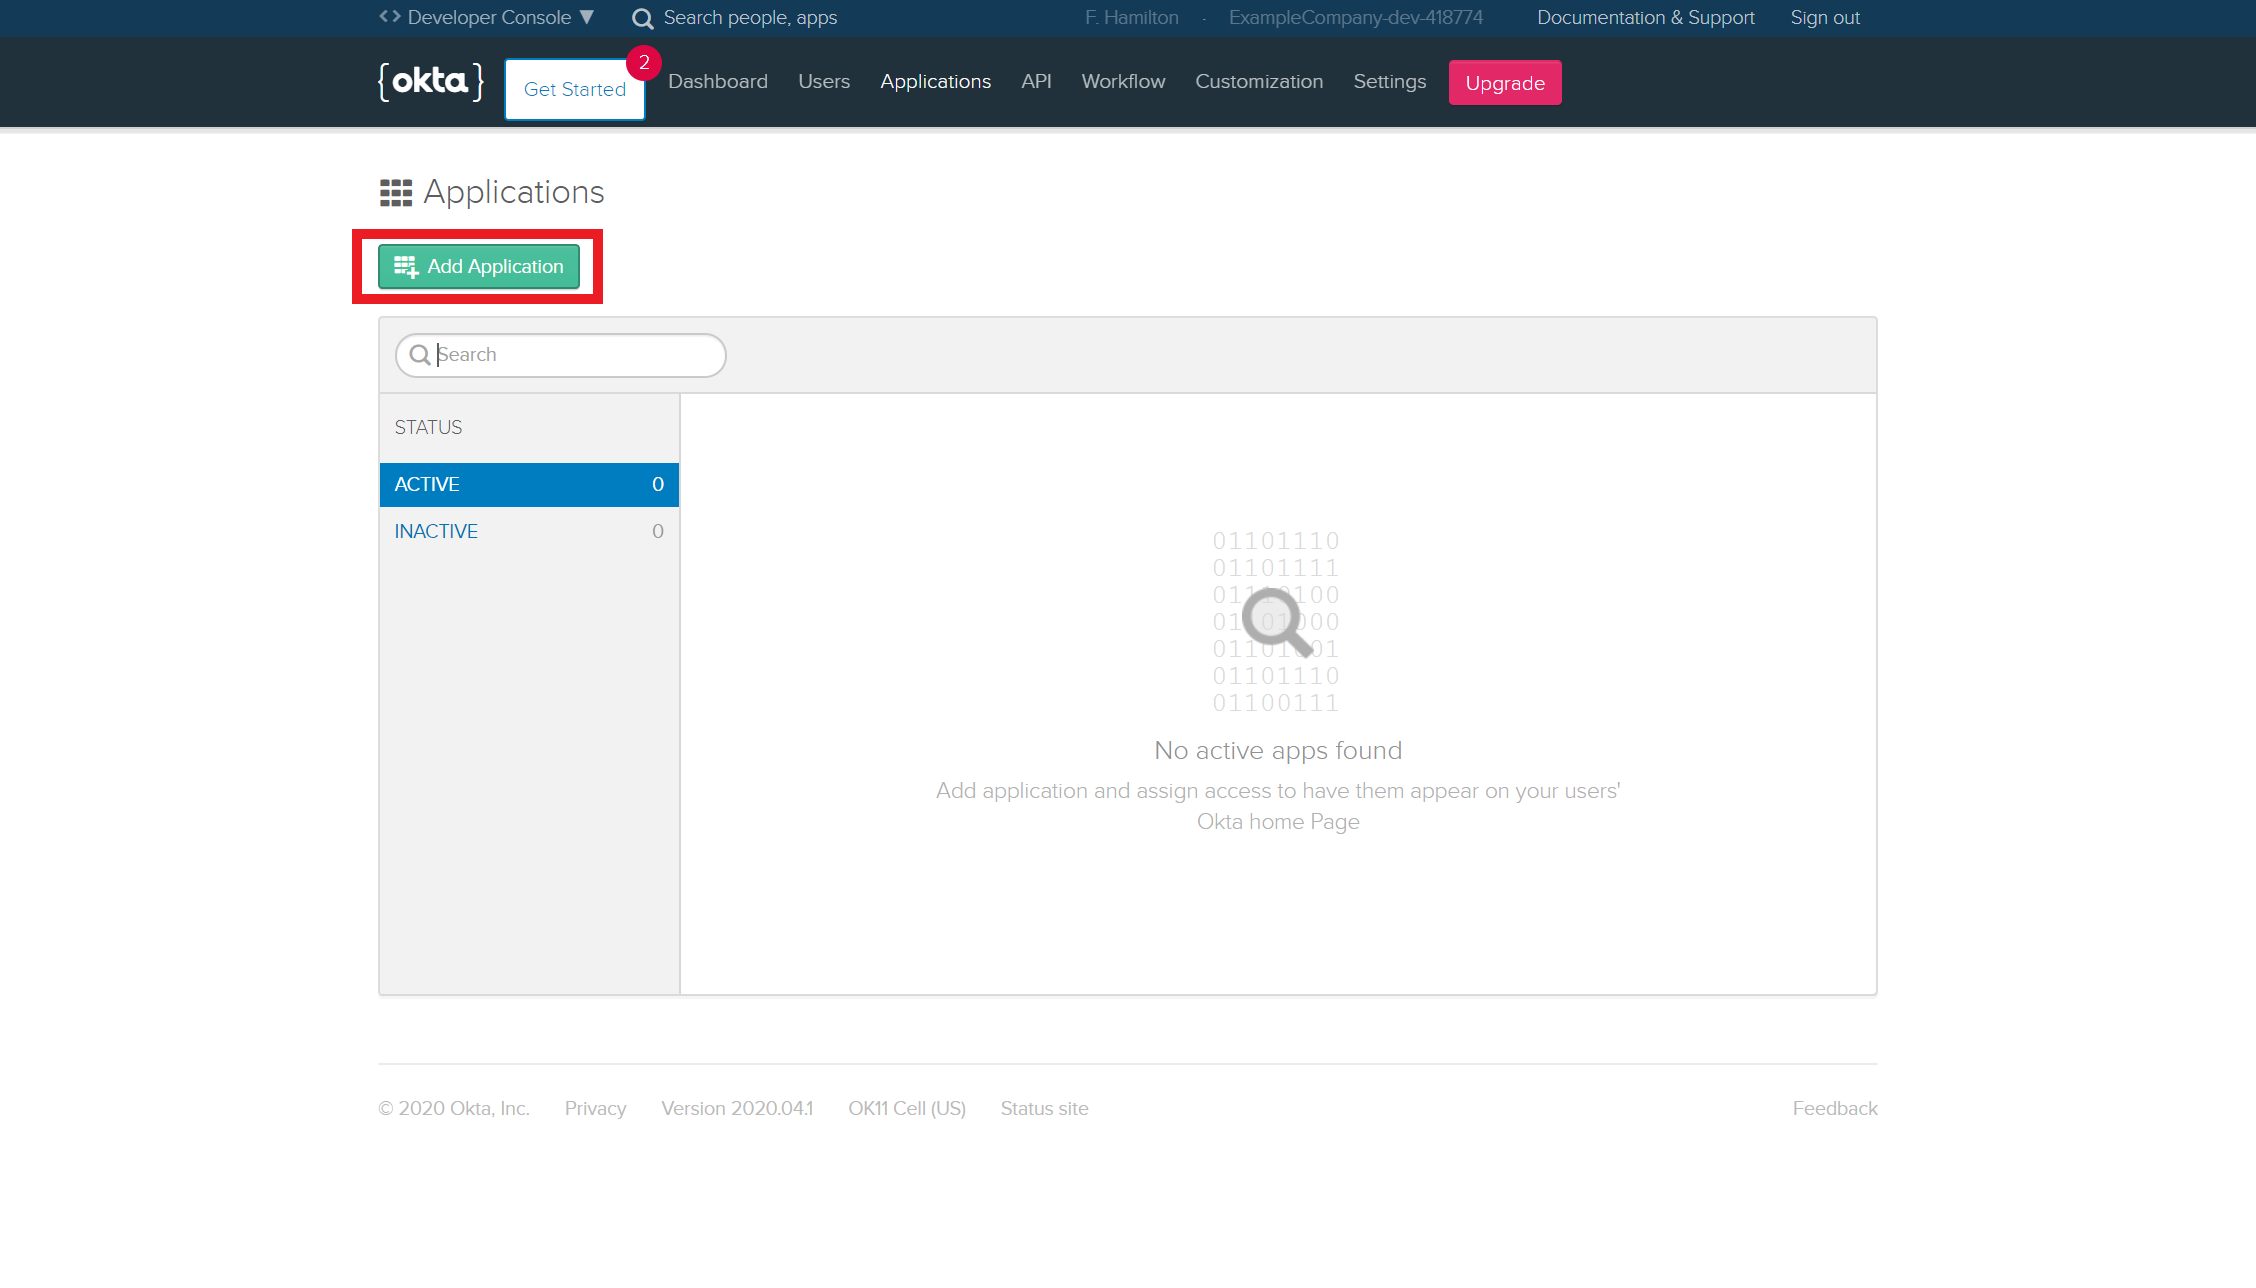
Next we need to create an Application so we can get the credentials we need for AuthSession. You can do this by going to Applications and clicking the green 'Add Application' button.

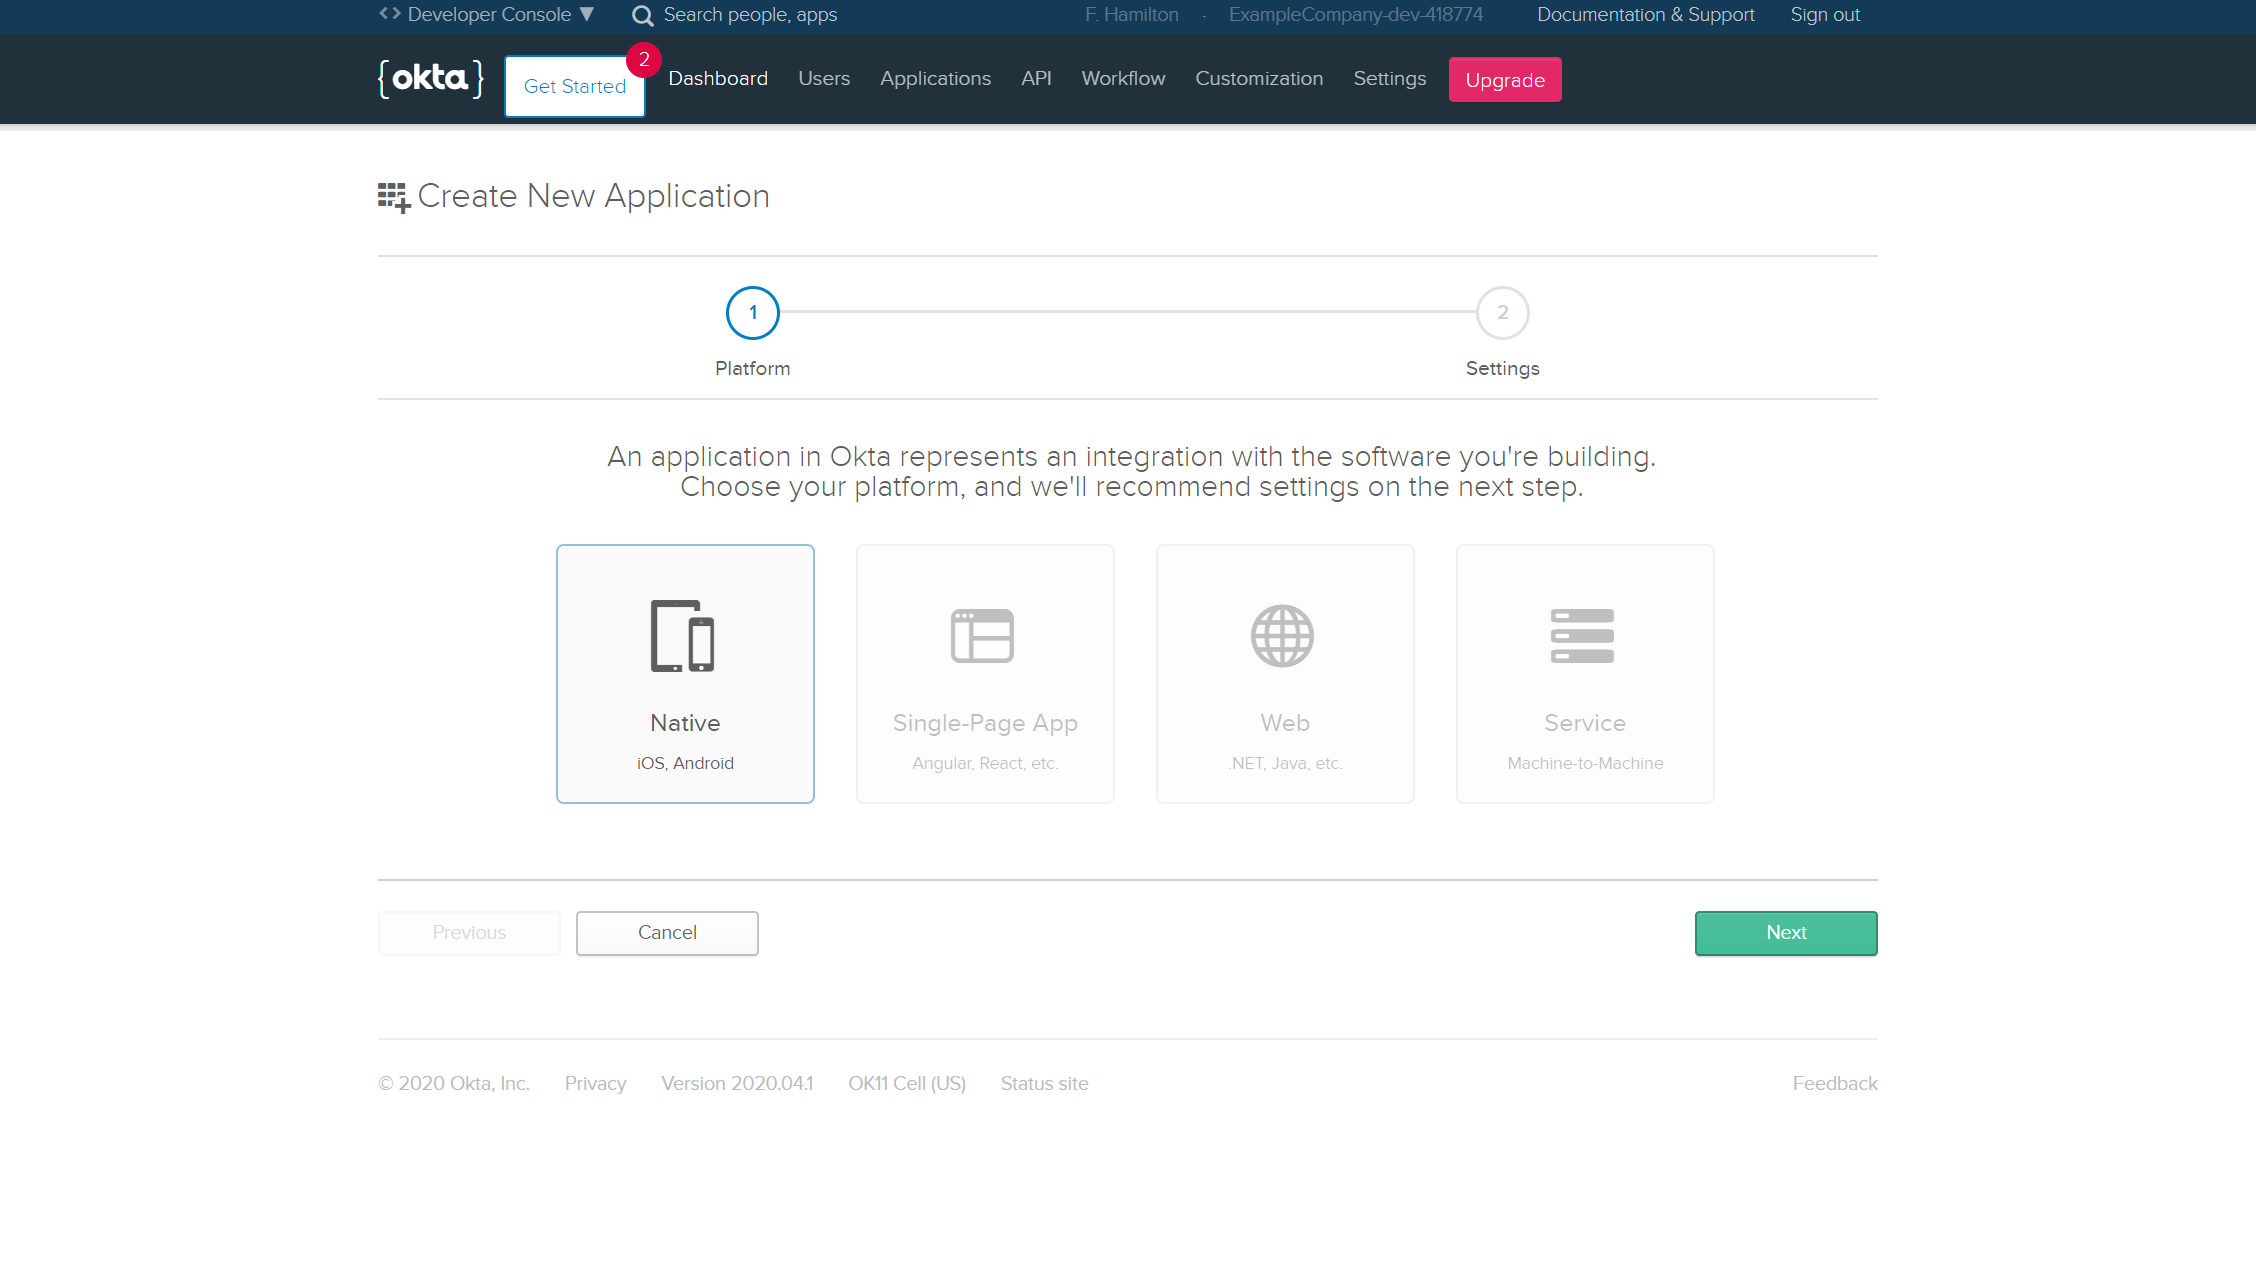
You'll want to select 'Native' as the platform on this next stage.

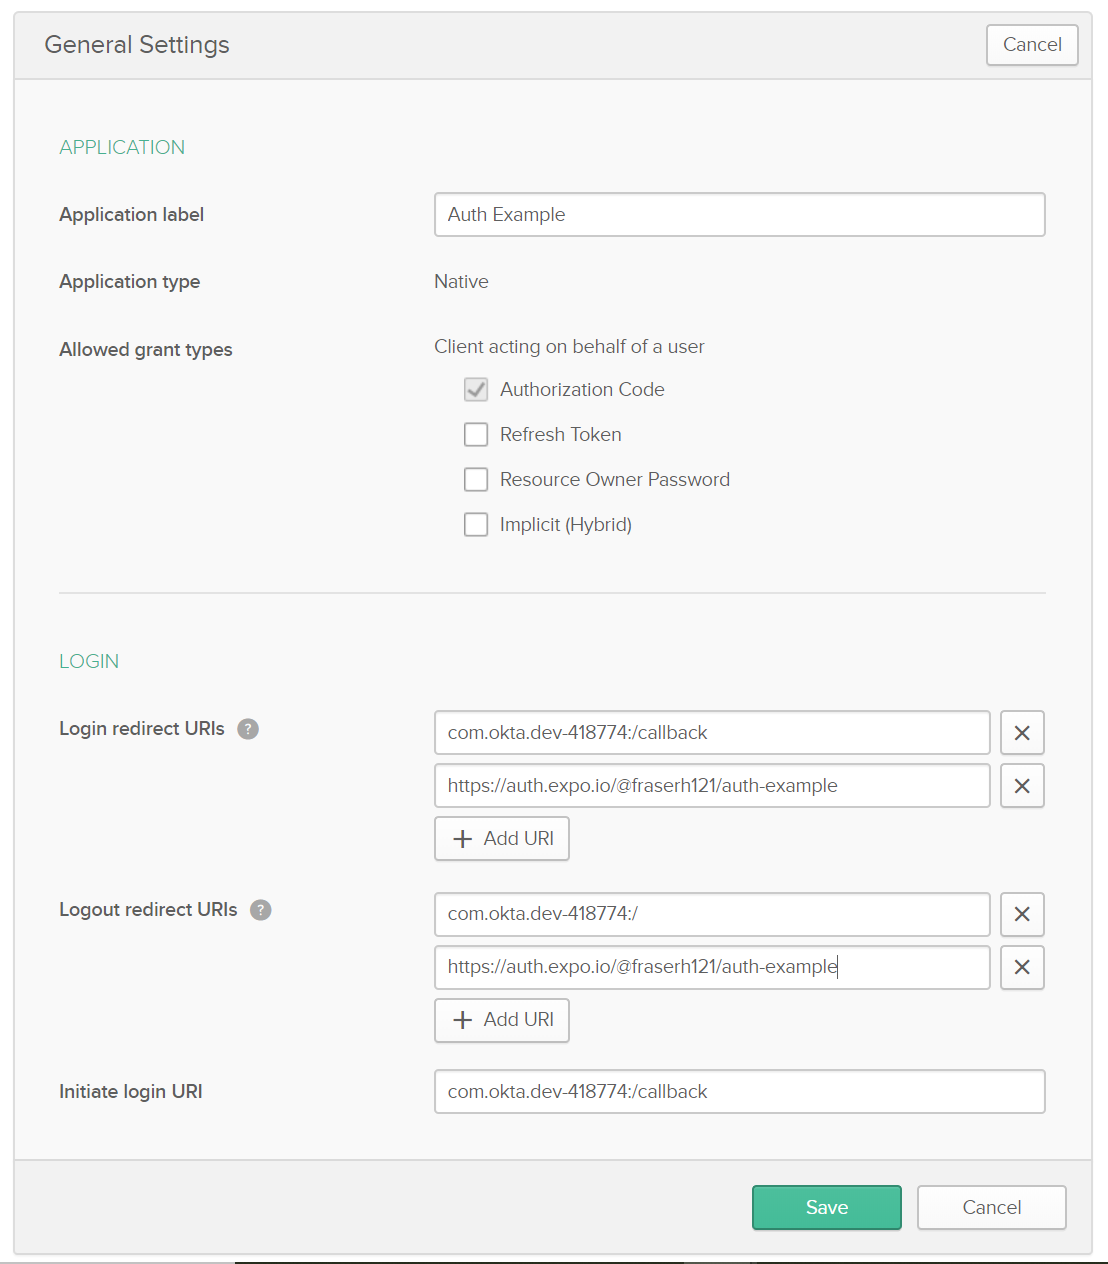
Finally we reach the settings page where we need to get a bit more involved. We need to give our application a name and configure both our login redirect URI and logout redirect URI to point at our application when we're running it in development. We want to add a new URI by hitting the plus button underneath the original and take note of the original for the next step.
The url that the proxy will create for you will be structured like this https://auth.expo.io/@{Expo Username}/{Project Name}, so for me on this particular project it's https://auth.expo.io/@fraserh121/auth-example.
You'll also want to take a note of the client ID at the bottom of this page as we'll need that later.

Modifying App.js
Now that we've finished setting up our Okta application we get to do the fun bit, the coding.
You'll need to replace the following fields to make this code work: {Your Okta Domain}, {Your Okta Client Id}, {The Original Okta Login Redirect URI}
import React from 'react';
import { Button, Platform, Text, View } from 'react-native';
import { useAutoDiscovery, useAuthRequest, makeRedirectUri } from 'expo-auth-session';
import { maybeCompleteAuthSession } from 'expo-web-browser';

if (Platform.OS === 'web') {
  maybeCompleteAuthSession();
}

const useProxy = true;

export default function App() {
  // Endpoint
  const discovery = useAutoDiscovery('https://{Your Okta Domain}/oauth2/default');

  // Request
  const [request, response, promptAsync] = useAuthRequest(
    {
      clientId: '{Your Okta Client Id}',
      scopes: ['openid', 'profile'],
      // For usage in managed apps using the proxy
      redirectUri: makeRedirectUri({
        // For usage in bare and standalone
        native: '{The Original Okta Login Redirect URI}',
        useProxy,
      }),
    },
    discovery
  );

  return (
    <View
      style={{
        flex: 1,
        justifyContent: 'center',
        alignItems: 'center',
      }}
    >
      <Button title="Login!" disabled={!request} onPress={() => promptAsync({ useProxy })} />
      {response && <Text>{JSON.stringify(response, null, 2)}</Text>}
    </View>
  );
}
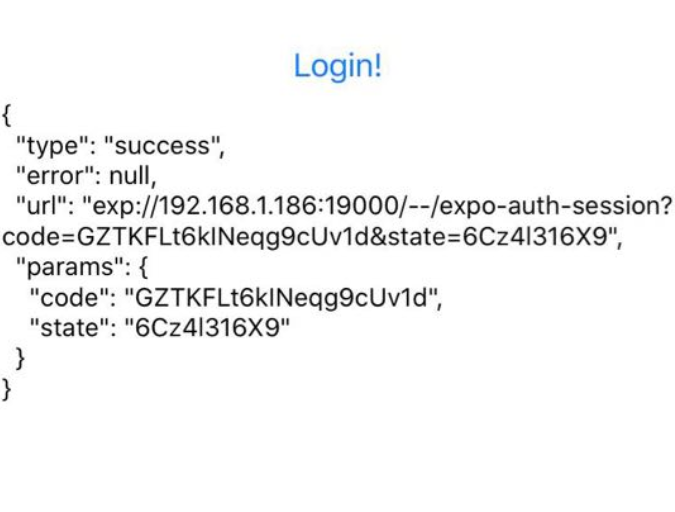
Mission Accomplished!
You should now be able to run your application and successfully go through the login flow on your device. You can include the token that's returned to your application during the redirect in your requests